
How to use your new Property
This lessons follows on from the previous lesson
The property you have just created is not much good where it is. You need to be able to call it into action. The way you do that is to create a new object from the Class, and then read and write to your property.
So double click the new button you added to your form. Add the following code to it:
Dim objAlterPicBoxAs ConvertPostcode
Dim NewHeight As Integer
objAlterPicBox = New ConvertPostcode
Two of the line you’ve already met: the one that creates a pointer to a variable (the first line), and the one that creates a new Object from your Class (the third line). The second line just sets up a variable called NewHeight.
To pass a value to your new Property (the Set part), add this line:
objAlterPicBox.ChangeHeight = Val( txtHeight.Text )
As soon as you type the name of your object variable, then a full stop, you’ll see the pop up box appear:
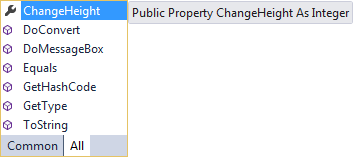
You should see your new Property on the list – ChangeHeight. (You can tell it’s a Property because the symbol next to it is a wrench.) If you double click the Property, the code is added for you.
After typing an equals sign, you then assign a value to your new property. Here, we’re just passing the property whatever value is inside of the textbox called txtHeight.
But we need to Get a value back out, so that we can do something with it. The way you Get at values is to put your code that accesses the property on the right hand side of an equals sign. On the left, You need the name of a variable.
So add the following to your code:
NewHeight = objAlterPicBox.ChangeHeight
So whatever value was stored inside of ChangeHeight (or Returned), Gets handed over to the NewHeight variable.
You can then set the height of the picture box:
PictureBox1.Height = NewHeight
When you add that line above, your Button code should look like this:

Notice the last line:
objAlterPicBox = Nothing
Because objects take up space in memory, you can release them by setting the object to Nothing. VB is supposed to do the cleaning up for you, but you can’t be sure that it’s doing its job properly. So it’s good form to release your own objects from memory.
When you’ve finished adding the code, run your programme and test it out. Click your new button and the Height of the picture box should change.
So just to recap:
- You set up a Property by using the following code stub:
Public Property PropertyName() As VaraibleType
Get
End Get
Set( Value As Integer)
End Set
End Property
- The Set Statement is for setting values for your properties
- The Get Statement is for returning values from your properties
- Once you’ve created a new object variable to use you class, type the name of the variable and select your property from the pop up list
- When you’re setting values for your property, the object variable and property go on the left hand side of the equals sign
ObjectVariableName.PropertyName= PropertyValue
- When you’re getting values from your property, the object variable and property go on the right hand side of the equals sign
VariableName = ObjectVariableName.PropertyName
- Release your objects from memory by using the Nothing keyword
OK, that’s just about it for this introduction to Classes and Objects. There’s an awful lot more to learn about Objects, but as a beginner you have learned the fundamentals.. Before you leave this topic, try this exercise:
Exercise O
Set up a property that changes the width of the Picture Box on your Form. Get the new width from a second textbox on your Form.
In the next section, we take a look at VB .NET and Databases.

